Skip to content
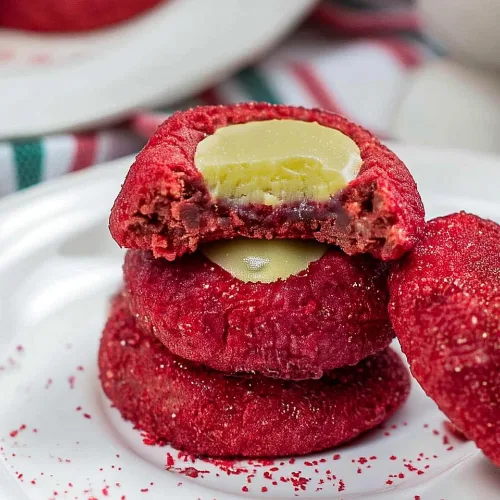
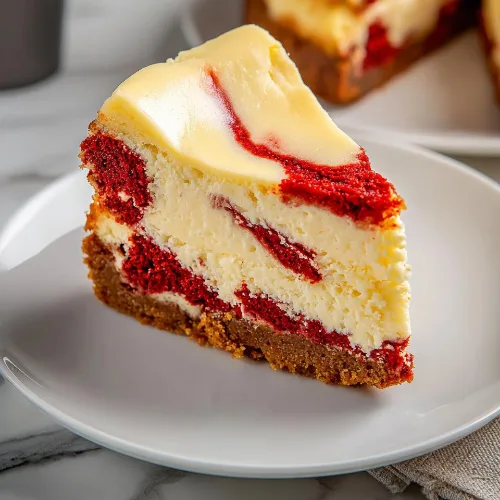
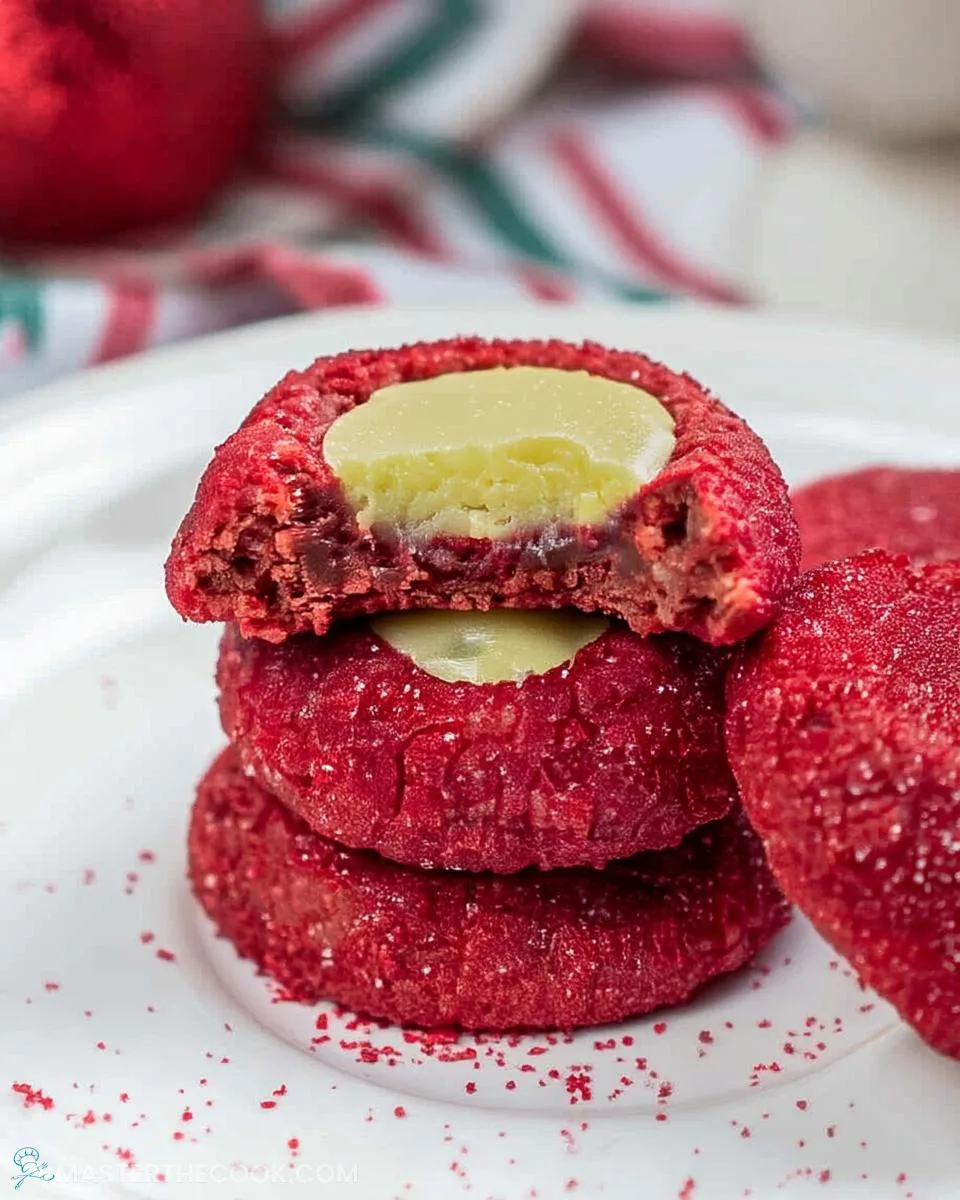
The soft, velvety texture draws you in. Red velvet cream cheese thumbprint cookies have a vibrant red color. They offer subtle cocoa warmth too. A swirl of tangy cream cheese frosting tops them. It melts in your mouth with every bite. These treats balance sweetness and richness well. They never overwhelm. So, they make an ideal quick bake. It feels indulgent every time. The thumbprint design holds the frosting perfectly. It adds a playful touch to each bite.
I often whip up a batch during busy holiday prep. They come together in under an hour. Plus, they yield plenty for sharing. They store well when chilled. This keeps them fresh for days. It’s a lifesaver for entertaining. It’s great for packing lunchbox surprises too. Friends always rave about the festive look. They love how the frosting adds creamy contrast just right.
Why You’ll Love this Recipe
- Quick and Easy: These red velvet cream cheese thumbprint cookies bake in just 10-12 minutes. They’re perfect for busy schedules. Yet, they don’t sacrifice flavor at all.
- Festive Flavor: The red velvet base brings mild cocoa tang. It pairs with creamy frosting for holiday cheer. This combo delights every season.
- Make-Ahead Friendly: Prepare the dough ahead. Then, chill it for effortless baking. It’s ideal when time runs short.
- Family Favorite: The thumbprint style delights kids and adults. Its fun, customizable filling wins everyone over. Picky eaters love the creamy center too.
Red Velvet Cream Cheese Thumbprint Cookies Ingredients
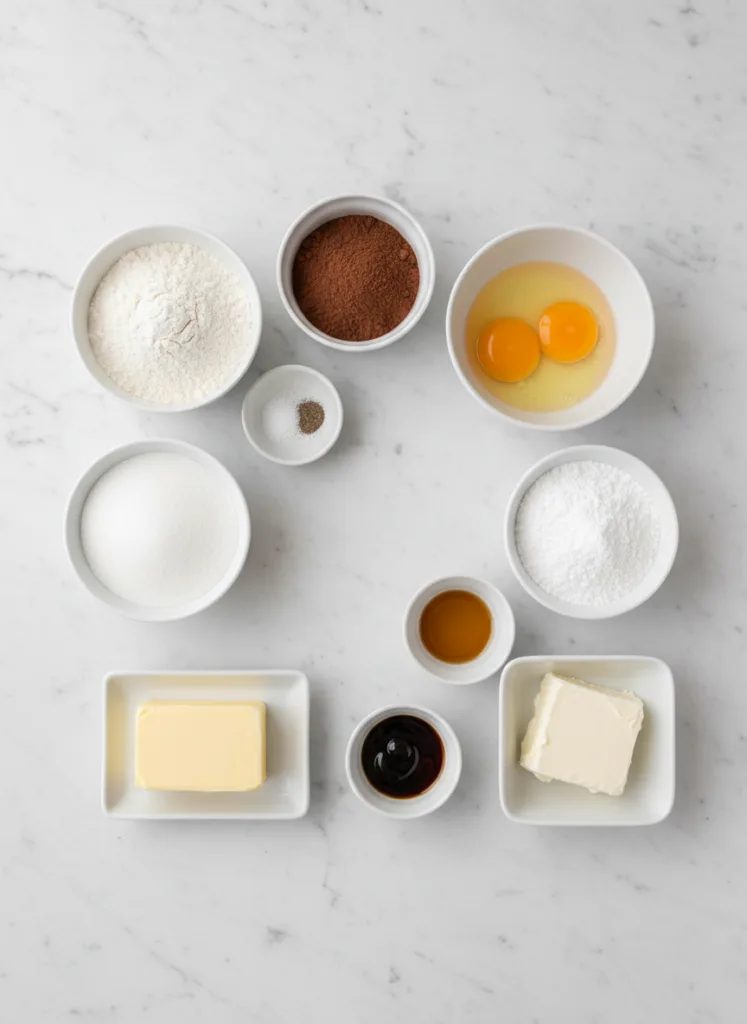
A few simple pantry staples create the soft red velvet dough. The tangy frosting complements it beautifully. High-quality cocoa and cream cheese elevate the taste. I keep these on hand for quick bakes. They solve my prep fatigue on busy days.
- Unsalted butter: I use this for richness and tenderness. It works in both the cookie dough and frosting base.
- Granulated sugar: It adds sweetness. Plus, it helps achieve a light, fluffy texture. I cream it well for best results.
- Large egg: This binds the dough for structure. It keeps cookies soft and moist too. One egg does the trick.
- Red food coloring: I add this for the signature vibrant red hue. It makes the velvety dough pop.
- Vanilla extract: This infuses subtle aromatic warmth. I use it in both cookies and frosting. It ties everything together.
- All-purpose flour: It forms the dough base. This gives a tender, non-cakey crumb. I measure it carefully.
- Unsweetened cocoa powder: This delivers classic red velvet chocolate. It adds undertone without overpowering sweetness.
- Salt: A pinch balances flavors. It enhances the overall taste profile nicely.
- Cream cheese: This creates the creamy, tangy filling. It contrasts the cookie’s richness perfectly. I soften it first.
- Powdered sugar: It thickens and sweetens the frosting. This ensures smooth piping consistency every time.
- Sprinkles: These are optional. I add them for a colorful, festive topping. They make sharing fun.
VIEW FULL RECIPE CARD FOR QUANTITIES AND STEPS.
How to Make Red Velvet Cream Cheese Thumbprint Cookies
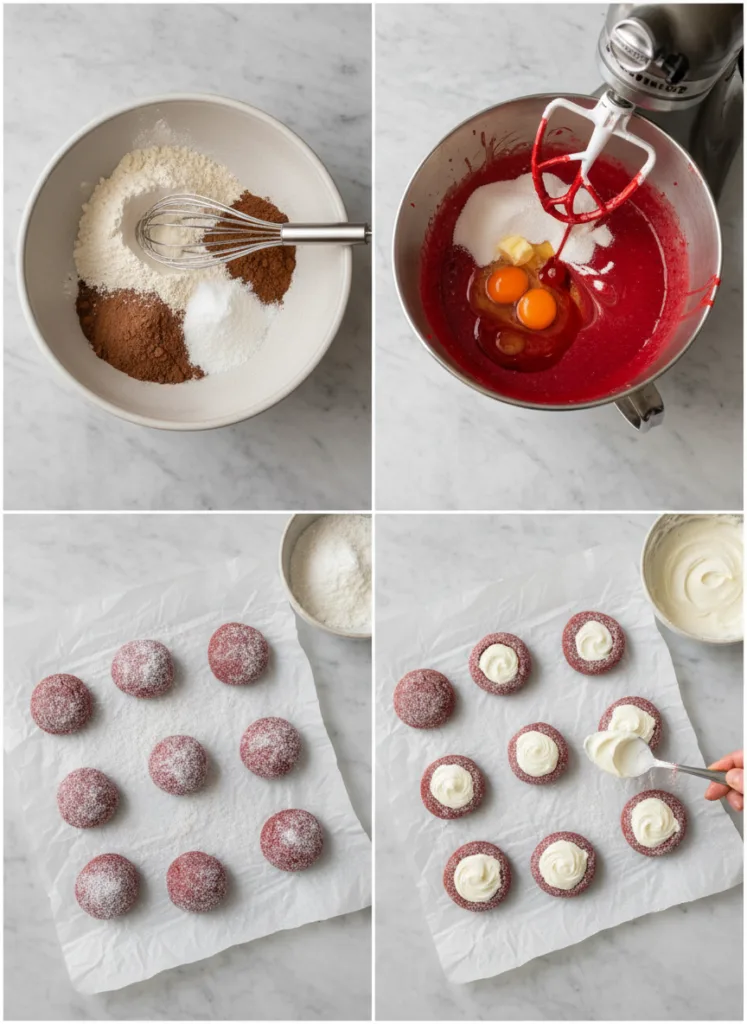
Step 1: Preheat and Prepare
I preheat my oven to 350°F. Then, I line a baking sheet with parchment paper. A silicone mat works too. This ensures easy release. It promotes even baking. Plus, it prevents sticking. So, your cookies stay intact. No more frustrating breaks for me.
Step 2: Cream Butter and Sugar
I start in a large bowl. I beat the softened butter and granulated sugar. I do this for about 2 minutes. The mixture turns light and fluffy. This step incorporates air. It leads to a tender cookie texture. I never skip creaming well. It makes all the difference.
Step 3: Add Wet Ingredients
Next, I beat in the egg. I add red food coloring too. Then, I mix in vanilla extract. I blend until everything combines fully. The coloring tints the dough evenly. This creates that iconic red velvet look. It’s vibrant and fun every time.
Step 4: Mix Dry Ingredients and Combine
I whisk the flour, cocoa powder, and salt together. I use a separate bowl for this. Then, I gradually add the dry mix to the wet. I stir until a soft dough forms. But, I avoid overmixing. This keeps the dough tender. It prevents toughness too. Simple habit for soft cookies.
Step 5: Shape and Bake Cookies
I roll the dough into 1-inch balls. I place them 2 inches apart on the sheet. Then, I press a thumb indentation in each center. I avoid going all the way through. Now, I bake for 10-12 minutes. After, I cool on wire racks. If indentations puff, I gently press them down while warm. This holds the filling perfectly.
Step 6: Prepare Cream Cheese Frosting
While cookies cool, I make the frosting. I beat softened butter and cream cheese first. I do this until fluffy, about 1-2 minutes. Then, I stir in vanilla extract. Gradually, I add powdered sugar. This creates a thick, creamy consistency. If needed, I add more sugar for piping. It’s smooth and tangy just right.
Step 7: Fill and Garnish
I use a piping bag with a star tip. A snipped sandwich bag works fine too. I fill each cooled indentation with frosting. This adds the creamy swirl. Optionally, I add sprinkles. They bring extra festivity. Now, serve and enjoy the compliments.
Expert Baking Tips
- Adjust Coloring: I prefer gel food coloring. It gives a deeper red. Plus, it won’t alter dough consistency.
- Press Indentations Firmly: I create wells while dough is soft. This ensures they hold the frosting shape. It works even after baking.
- Cool Completely: I let cookies fully cool before filling. This prevents frosting from melting. It stays swirled on top nicely.
- Chill Frosting Briefly: If piping feels tricky, I refrigerate frosting for 10 minutes. This firms it up. Easier swirls every time.
How to Serve Red Velvet Cream Cheese Thumbprint Cookies
Garnishes
I love topping these red velvet cream cheese thumbprint cookies with colorful sprinkles. They add a festive pop. Or, I dust with powdered sugar. This enhances their snowy look. Fresh berries like raspberries work great too. They bring a bright, tart contrast. It cuts through the sweetness nicely. Perfect for picky eaters.
Side Dishes
I pair the cookies with warm coffee. Hot cocoa balances their creamy richness too. This suits cozy evenings. For holiday spreads, I serve with sliced strawberries. They’re refreshing and vibrant. This keeps things light. Everyone enjoys the combo. It solves my after-dinner dessert fatigue.
Make Ahead and Storage
Storing Leftovers
I always store these red velvet cream cheese thumbprint cookies in an airtight container. I keep them in the fridge. This maintains freshness up to a week. The frosting stays firm. It prevents sogginess from cream cheese too. Great for busy weeknights.
Reheating
For reheating, I pop a cookie in the microwave. I do 10-15 seconds. Or, I warm in a 300°F oven for a minute. This softens without melting frosting. If using oven, I cover with foil. It retains moisture. No dry edges that way.
PrintEasy Red Velvet Cream Cheese Thumbprint Cookies

Soft red velvet thumbprint cookies with a creamy cream cheese frosting filling, perfect for holidays and easy to make.
- Prep Time: 20 minutes
- Cook Time: 10-12 minutes
- Total Time: 30-35 minutes
- Yield: 24–30 cookies 1x
- Category: Dessert
- Method: Baking
- Cuisine: American
- Diet: Vegetarian
Ingredients
- For the Cookies:
- 1 cup unsalted butter, softened
- 1 cup granulated sugar
- 1 large egg
- 1 tbsp red food coloring
- 1 tsp vanilla extract
- 2.5 cups all-purpose flour
- 3 tbsp unsweetened cocoa powder
- 1/4 tsp salt
- For the Cream Cheese Frosting:
- 2 tbsp unsalted butter, softened
- 2 oz cream cheese, softened
- 1/2 tsp vanilla extract
- 2 cups powdered sugar
- Optional: Sprinkles for garnish
Instructions
- Preheat your oven to 350°F (175°C). Prepare a baking sheet by lining it with parchment paper or a silicone baking mat.
- In a large bowl, cream together the softened butter and granulated sugar for about 2 minutes, until the mixture is light and fluffy.
- Beat in the egg, red food coloring, and vanilla extract until they are thoroughly blended into the butter mixture.
- In a separate bowl, whisk together the all-purpose flour, unsweetened cocoa powder, and salt. Gradually add these dry ingredients to the wet mixture, mixing until just combined and a soft dough forms.
- Roll the dough into 1-inch balls. Place them approximately 2 inches apart on your prepared baking sheet. Using your thumb, create a small indentation in the center of each cookie, being careful not to press all the way through to the sheet.
- Bake for 10-12 minutes. Once baked, let the cookies cool completely on wire racks. If any indentations have puffed up, gently press them back down while the cookies are still warm.
- While the cookies cool, prepare the cream cheese frosting. In a medium mixing bowl, beat together the softened butter and softened cream cheese until the mixture is light and fluffy (this should take 1-2 minutes).
- Stir in the vanilla extract, then gradually incorporate the powdered sugar until the frosting is smooth, thick, and creamy enough to pipe. If needed, add a touch more powdered sugar for desired consistency.
- Fit a decorating bag with a star tip (or simply snip the corner of a sandwich bag). Pipe the luscious cream cheese frosting into the center of each cooled thumbprint cookie.
- Optionally, adorn with sprinkles for an extra festive touch before serving. Store these delightful cookies covered and chilled.
Notes
- Store cookies covered and chilled for best freshness.
- Adjust food coloring for desired red hue.
Nutrition
- Serving Size: 1 cookie
- Calories: 150
- Sugar: 12g
- Sodium: 50mg
- Fat: 8g
- Saturated Fat: 5g
- Unsaturated Fat: 2g
- Trans Fat: 0g
- Carbohydrates: 18g
- Fiber: 0.5g
- Protein: 2g
- Cholesterol: 25mg