Skip to content
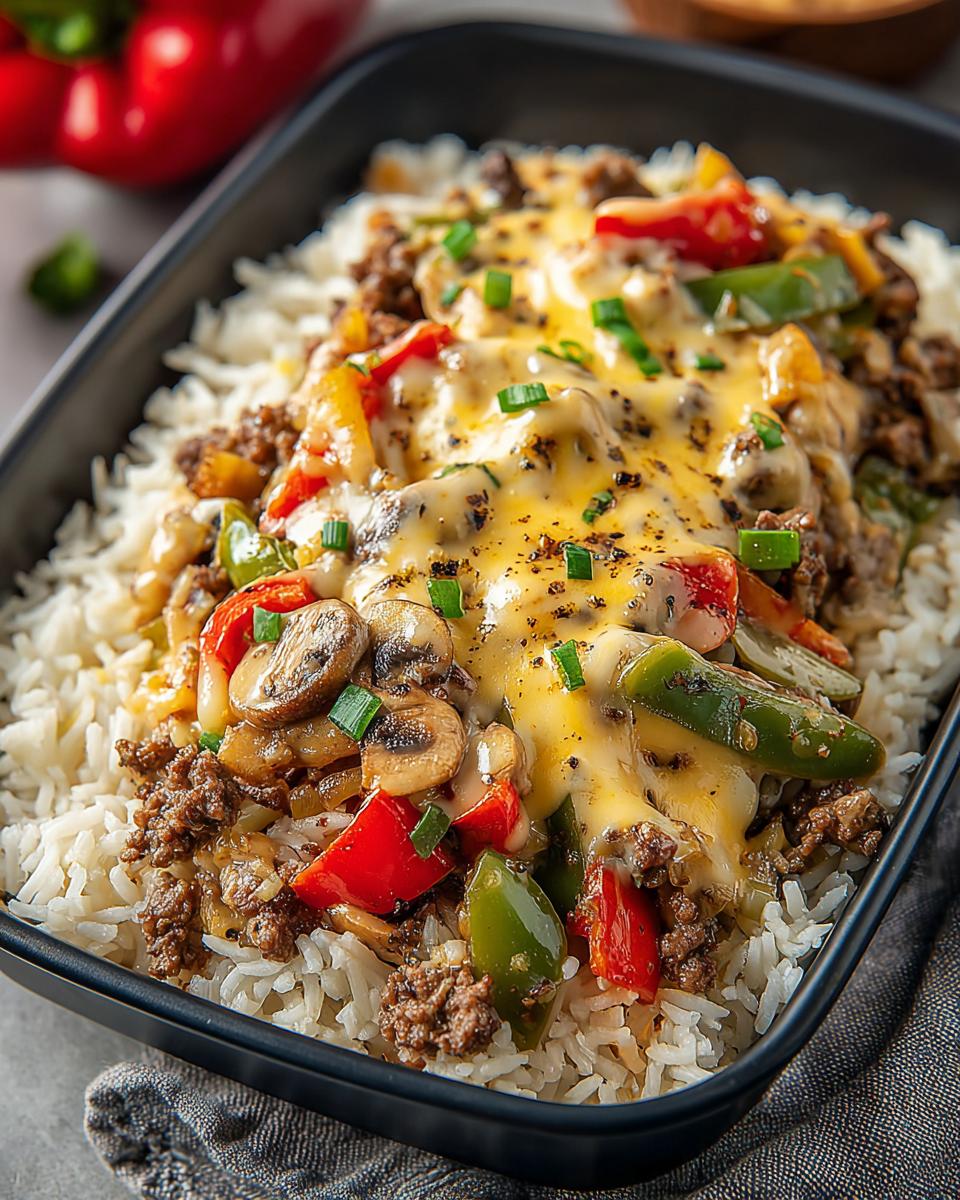
As a busy mom juggling work deadlines and school pickups, I often crave the hearty flavors of a Philly cheesesteak without the hassle of slicing steak or dining out. Ground Beef Philly Cheesesteak Meal Prep simplifies that classic sandwich into a quick, savory bowl topped with melted cheese and served over rice, using lean ground beef for a lighter twist. The tender vegetables and seasonings create a comforting meal that feels indulgent yet straightforward to prepare.
This version is perfect for packing lunches ahead, storing easily in the fridge for up to four days, and reheating without losing its cheesy goodness. Families love how customizable it is, especially with a low-carb swap like cauliflower rice. It saves time during the week while delivering that satisfying, umami-packed bite everyone craves.
Why You’ll Love this Recipe
- Quick and Easy: Whip up this Ground Beef Philly Cheesesteak Meal Prep in under 30 minutes for stress-free lunches that beat takeout.
- Family Favorite: The savory beef and melted cheese appeal to kids and adults alike, making it a versatile weeknight win.
- Meal Prep Hero: Portion it into containers for grab-and-go meals that stay fresh and flavorful for days.
- Customizable Base: Swap rice for cauliflower to fit low-carb diets without sacrificing the classic taste.
Ground Beef Philly Cheesesteak Meal Prep Ingredients
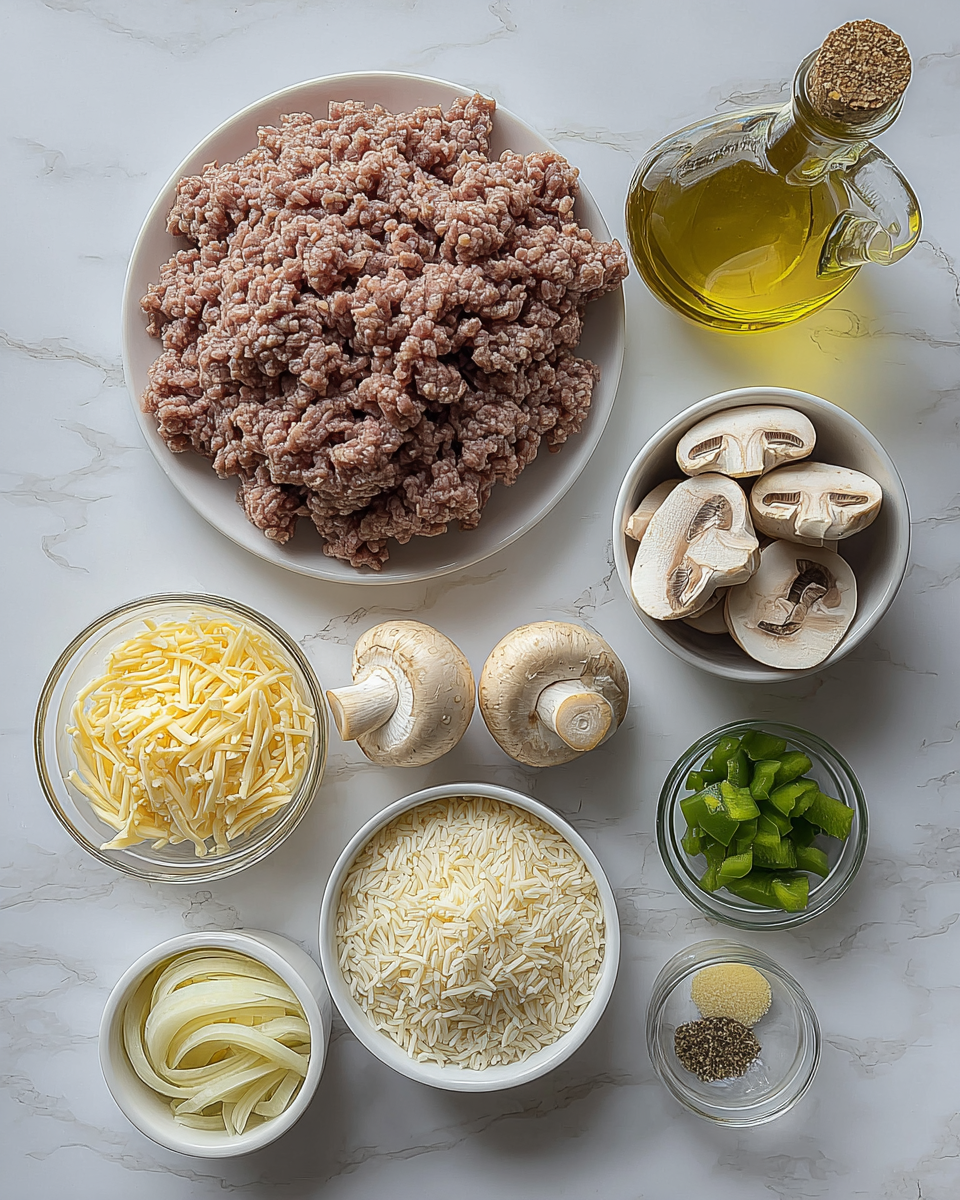
These ingredients blend the iconic Philly flavors with simple pantry staples, while using lean beef keeps it lighter and fresher tasting with quality produce.
- Lean ground beef: Provides a tender, flavorful protein base that’s easier to cook than sliced steak.
- Green bell pepper: Adds a slight crunch and fresh, vegetal sweetness to balance the richness.
- Yellow onion: Brings caramelized depth and subtle sharpness when sautéed.
- Sliced mushrooms: Offer an earthy umami that mimics traditional cheesesteak texture.
- Worcestershire sauce: Infuses a tangy, savory boost to enhance the beef’s natural flavors.
- Beef broth: Helps deglaze and meld everything into a juicy mixture.
- Garlic powder: Delivers quick, aromatic seasoning without chopping fresh garlic.
- Salt: Seasons the dish to highlight all the fresh ingredients.
- Black pepper: Adds a mild kick for balanced warmth.
- Shredded Colby Jack or provolone cheese: Melts into gooey, stretchy layers for that authentic cheesesteak finish.
- Cooked basmati rice: Serves as a fluffy base; swap for cauliflower rice in low-carb versions.
- Olive oil: Used for sautéing to prevent sticking and add a touch of healthy fat.
Simple Ground Beef Philly Cheesesteak Meal Prep
A simple meal prep version of the classic Philly cheesesteak using lean ground beef, vegetables, and cheese, served over rice for easy lunches.
- Yield: 4–6 servings 1x
- Category: Meal Prep
- Method: Stovetop
- Cuisine: American
- Diet: Low Fat
Ingredients
- 1.5 lbs lean ground beef
- 1 medium green bell pepper, diced
- 1 small yellow onion, sliced or diced
- 2 cups sliced mushrooms
- 2 teaspoons Worcestershire sauce
- 1/4 cup beef broth
- 1 teaspoon garlic powder
- 1/2 teaspoon salt
- 1/4 teaspoon black pepper
- 1 cup shredded Colby Jack or provolone cheese
- 4–6 servings cooked basmati rice (or cauliflower rice for low-carb)
- 1 tablespoon olive oil
Instructions
- Heat olive oil in a large skillet or oven-safe pan over medium-high heat. Add the ground beef and cook, breaking it apart, until fully browned. Drain any excess grease and set the beef aside.
- In the same skillet, add a little more oil if needed, then add the diced green bell pepper, sliced onion, and sliced mushrooms. Sauté until the vegetables are tender and slightly caramelized, about 7-10 minutes.
- Return the cooked ground beef to the skillet with the vegetables. Stir in the Worcestershire sauce, beef broth, garlic powder, salt, and black pepper. Cook for another 2-3 minutes to allow the flavors to meld.
- Remove the skillet from heat. Sprinkle the shredded Colby Jack or provolone cheese evenly over the beef and vegetable mixture.
- If your skillet is oven-safe, place it under a broiler for 2-3 minutes, or until the cheese is melted and bubbly. Alternatively, cover the skillet with a lid for a few minutes to melt the cheese.
- To meal prep, divide the cooked basmati rice (or cauliflower rice) among 4-6 meal prep containers. Top each with a generous serving of the cheesy ground beef and vegetable mixture.
- Allow the bowls to cool completely before sealing and refrigerating for up to 3-4 days. Reheat in the microwave or on the stovetop.
Notes
- Use cauliflower rice for a low-carb option.
- Store in the refrigerator for up to 3-4 days.
How to Make Ground Beef Philly Cheesesteak Meal Prep
Step 1: Brown the Beef
Heat olive oil in a large skillet over medium-high heat, then add the lean ground beef. Cook it while breaking it apart with a spoon until fully browned, which takes about 5-7 minutes. Drain any excess grease and set the beef aside to keep it lean and ready for the next step.
Step 2: Sauté the Vegetables
In the same skillet, add a bit more oil if needed, then toss in the diced green bell pepper, sliced yellow onion, and sliced mushrooms. Sauté them until tender and slightly caramelized, stirring occasionally for 7-10 minutes to build those rich flavors. This step softens the veggies without making them mushy.
Step 3: Combine and Season
Return the browned ground beef to the skillet with the vegetables. Stir in the Worcestershire sauce, beef broth, garlic powder, salt, and black pepper, then cook everything together for 2-3 minutes. This allows the seasonings to infuse deeply for a cohesive, savory mixture.
Step 4: Add and Melt the Cheese
Remove the skillet from the heat and sprinkle the shredded Colby Jack or provolone cheese evenly over the top. For bubbly results, use an oven-safe skillet under the broiler for 2-3 minutes, or simply cover with a lid on the stovetop for a few minutes to melt gently.
Step 5: Assemble the Meal Prep Bowls
Divide the cooked basmati rice—or cauliflower rice for a low-carb option—among 4-6 meal prep containers. Top each portion with a generous scoop of the cheesy beef and vegetable mixture to create balanced, portable lunches.
Step 6: Cool and Store
Let the assembled bowls cool completely at room temperature before sealing the containers. This prevents condensation and keeps the meal prep fresh when refrigerated for up to 3-4 days.
Expert Baking Tips
- Drain Excess Fat: After browning the ground beef, always drain the grease to keep the Ground Beef Philly Cheesesteak Meal Prep lean and less oily.
- Caramelize Veggies Slowly: Sauté onions and peppers over medium heat for even tenderness without burning, enhancing natural sweetness.
- Melt Cheese Evenly: Use the broiler sparingly for just 2-3 minutes to avoid over-browning while achieving that perfect bubbly top.
- Portion Rice First: Divide the base before adding toppings to ensure consistent servings and easier reheating.
How to Serve Ground Beef Philly Cheesesteak Meal Prep
Garnishes
I like to sprinkle fresh chopped parsley or a dash of hot sauce over my Ground Beef Philly Cheesesteak Meal Prep for a bright, herby lift that cuts through the cheesiness. A few pickle slices add a tangy crunch, or try sesame seeds for subtle nuttiness. These simple touches make each bowl feel restaurant-fresh without extra effort.
Side Dishes
Pair it with a crisp green salad dressed in vinaigrette to balance the hearty filling with refreshing lightness. I often add steamed broccoli or a small cup of fruit salad for color and nutrition. These sides keep the meal well-rounded and satisfying for lunch on the go.
Make Ahead and Storage
Storing Leftovers
I always cool my Ground Beef Philly Cheesesteak Meal Prep bowls completely before transferring them to airtight containers, which helps maintain texture. Store them in the refrigerator for up to 3-4 days, or freeze portions for longer if needed, though the veggies might soften slightly upon thawing. This method keeps everything safe and ready for the week.
Reheating
For quick lunches, I reheat a single serving in the microwave for 1-2 minutes, covered with a damp paper towel to retain moisture. On busier days, warm it gently on the stovetop over low heat with a splash of broth to revive the flavors. Either way, the cheese melts back to gooey perfection without drying out.