Skip to content
These Mini Quiches turn out perfectly flaky every single time. They are golden, tender little bites. Frankly, they are perfect for busy mornings or unexpected guests. I first developed this recipe years ago. My goal was conquering breakfast fatigue effortlessly. I needed something portable, truly. Now, these little gems grace my brunch table often.
Indeed, I tested this recipe nearly twenty times. That is no exaggeration, by the way. We tried different milk ratios constantly. However, the real magic comes from chilling the custard heavily. This small step changes everything dramatically. Wait until you see the incredible texture difference it makes.
Why You’ll Love These Mini Quiches
- Ultimate Make-Ahead Marvel: Bake a batch Sunday. Enjoy grab-and-go breakfasts all week long. Who needs morning rush stress?
- Perfect Portion Control: These Mini Quiches are perfectly sized single servings. Great for brunch buffets or light lunches easily.
- Flavor Flexibility: Swap in your favorite fillings every time. They easily accommodate picky eaters or dietary needs quickly.
- Flaky Perfection Guaranteed: Our simple technique ensures tender filling meets a crisp crust. You will adore this texture combination always.
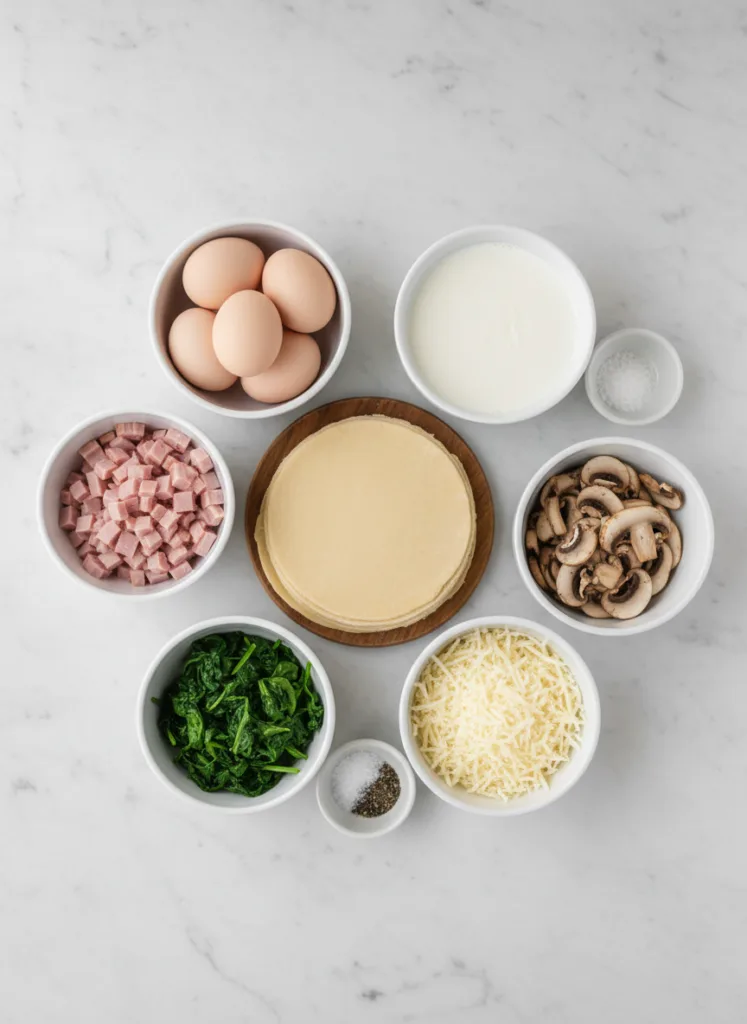
Ingredients You’ll Need
Gathering these simple components is half the battle, honestly. The ingredients really create a beautiful balance of richness and texture. I always say, fresh cream is non-negotiable here for the best result. Also, grating your own Swiss cheese makes a world of difference in how smoothly it melts. Let’s look at what you need for these fantastic Mini Quiches.
Assembling the Components
- Pie crusts: Use two store-bought crusts for speed. If you make them homemade, chill them overnight; that is essential.
Crust and Dairy Base
- Large eggs: We need three of these fundamental binders. They give structure to our lovely custard filling.
- Whole milk: Use half a cup of whole milk for tenderness. Low-fat milk makes the centers slightly watery, sadly.
- Heavy cream: Half a cup of heavy cream adds necessary richness. This is key for a luxurious mouthfeel, truly.
- Salt: Only a quarter teaspoon balances the richness perfectly. Do not skip seasoning this base mixture.
- Black pepper: An eighth of a teaspoon provides necessary warmth. Freshly cracked pepper tastes much brighter.
Flavor Enhancers and Add-ins
- Cooked ham: About two-thirds cup, diced small, adds a savory punch. Use good quality deli ham for flavor depth.
- Fresh spinach: Two to three tablespoons work well here. Make sure you wilt and squeeze out all surface water first.
- Shredded Swiss cheese: Use half a cup of this nutty cheese. Swiss melts beautifully into our creamy egg mixture.
How to Make Mini Quiches
Making these wonderful Mini Quiches is surprisingly straightforward. We will break down the process simply. Follow these steps exactly for success. You will soon have perfect little bites ready to eat.
Step 1: Preparing the Crusts
First, make sure your pie dough stays very cold. Chilled dough handles much better, trust me. Preheat your oven to 375 degrees Fahrenheit. Now, lightly spray your mini muffin pans very well. You need two pans for a good yield.
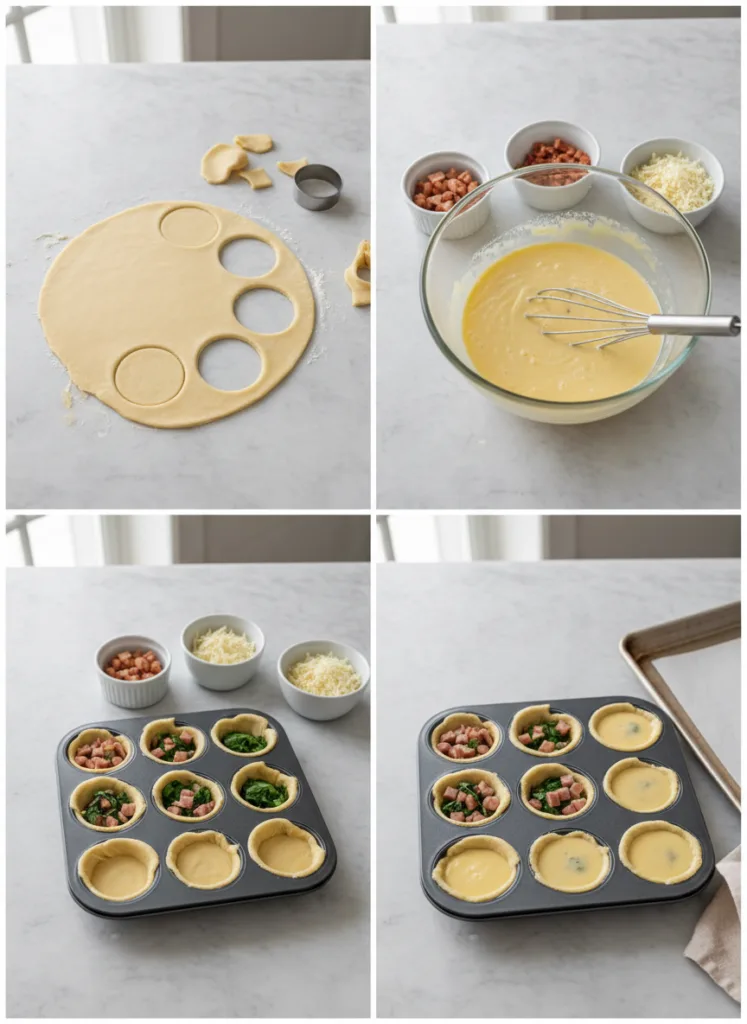
Next, dust your clean counter surface lightly. Roll out one cold pie crust gently. Use a round cutter, maybe 2.5 inches wide. Cut out many small circles from the dough. Carefully press each circle into the prepared muffin cups. Repeat this process with the second crust dough.
Step 2: Creating the Custard Base
Get out a nice large mixing bowl now. Vigorously whisk your eggs together first. Add the whole milk and the heavy cream next. Season this base with salt and pepper carefully. Whisk until the mixture looks slightly frothy, about one minute total. Cover this egg custard mixture. Pop it into the refrigerator right away until needed.
Step 3: Filling the Shells
It is time to add the flavor components now. Distribute your chosen fillings evenly into the unbaked crust cups. I like to place the ham, spinach, or Swiss cheese directly inside. Do not mix them into the main custard beforehand. Pour the chilled egg filling over these items gently. Fill each little pie cup almost completely to the top edge.
Step 4: Baking and Setting
Carefully place the filled pans into the hot oven. Bake them for about 16 to 19 minutes precisely. You want the tops to look lightly golden brown soon. The quiches must appear fully set when done. Let them cool in the pan for a few moments. This slight cooling helps them firm up nicely before removal.
How to Serve Mini Quiches
Serving these delightful Mini Quiches makes any meal feel a bit fancy. They are so versatile, honestly. A simple little bite can shine with the right additions. I enjoy dressing them up for company. However, they are just as good served straight from the cooling rack, frankly.
Garnishes
A little garnish elevates these treats immediately. Freshness cuts through the richness beautifully. I absolutely love a sprinkle of finely chopped fresh chives on top. They add a gentle oniony bite, wonderfully contrasting the creamy interior. Sometimes, I add a tiny dollop of sour cream too. A single fresh sprig of dill works wonders as well. These final touches just perfect the look.
Side Dishes
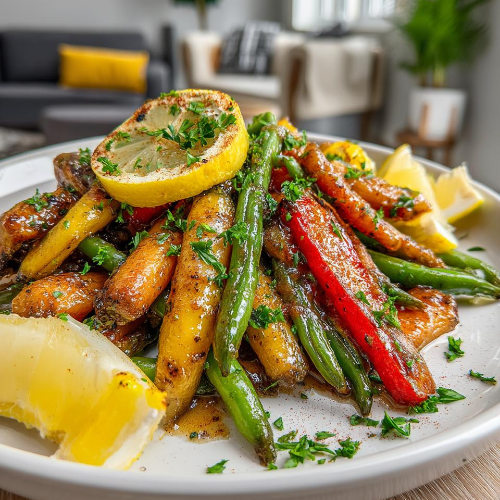
These savory breakfast items need light companions, generally. A simple mixed green salad works perfectly well. Toss those greens with a bright lemon vinaigrette dressing. That acidity cleanses the palate nicely. For a heartier brunch, try serving them alongside fresh, seasonal fruit salad. The sweetness plays beautifully against the salty ham if you used it. Even simple roasted asparagus works great.
Creative Ways to Present
Presentation is everything when entertaining guests, I find. For a casual morning gathering, arrange the Mini Quiches on a lovely tiered serving tray. This maximizes space impressively. It looks abundant and inviting, too. Alternatively, for a sophisticated dinner party, serve them warm on dark slate platters. Place small edible flowers near each quiche. People notice those thoughtful details immensely.
Make Ahead and Storage
I know your schedule is tight, believe me. Life gets busy fast. That is why mastering make-ahead meals is crucial. These Mini Quiches store like a dream, which saves so much time later. Let us talk about keeping them fresh for days.
Storing Leftovers
Proper storage keeps your leftovers tasting great. Place fully cooled quiches into an airtight container quickly. I prefer glass containers myself. Refrigerate them promptly after cooling down completely. They last very well for up to four days in the fridge. If you used a fresh garnish like sour cream, remove it first. Store any sauces completely separately until serving time.
Freezing
Freezing these little wonders is totally doable. Yes, you absolutely can freeze your baked Mini Quiches. Ensure they are cooled down before you attempt this step. Wrap each one individually in plastic wrap tightly first. Then, tuck them into a heavy-duty freezer bag. They keep well for about two whole months. Thaw them overnight in the refrigerator before reheating them safely.
Reheating
The oven offers the best reheating experience always. Set your oven temperature to 350 degrees Fahrenheit. Pop the frozen or thawed quiches onto a baking sheet. Warm them until they are hot throughout, about 8 to 10 minutes. Microwaving works in a pinch, truly. However, the microwave can leave the crust a bit soft. Always reheat fully before eating them again.

Recipe Tips
- Preparation Tips: For a cleaner cut, chill your pie crusts longer. Always squeeze all excess moisture from spinach before adding it. Finely chop all meat add-ins very small. This ensures even filling distribution.
- Cooking Techniques: If your oven runs hot, check them early at 15 minutes. You want set centers, not rubbery ones. Adjust baking time for different pan sizes.
- Substitutions: Feel free to substitute milk for cream, but reduce the milk slightly. Try half-and-half instead of cream and milk combined. Gruyere cheese works wonderfully here instead of Swiss.
- Pro Tips: Never overfill the crusts; leave a little rim. This prevents filling from spilling over while baking your Mini Quiches.
Mini Quiches

A recipe for making small, individual quiches using pie crusts and a simple egg and cream filling, customizable with various add-ins.
- Category: Appetizer/Breakfast
- Method: Baking
- Diet: Vegetarian
Ingredients
- 2 pie crusts (store-bought or homemade, chilled)
- 3 large eggs
- 1/2 cup whole milk
- 1/2 cup heavy cream
- 1/4 teaspoon salt
- 1/8 teaspoon black pepper
- Optional Add-ins (e.g., 2/3 cup cooked ham, 2-3 Tbsp fresh spinach, 1/2 cup shredded Swiss cheese)
Instructions
- Ensure your pie dough is thoroughly chilled; if homemade, this typically requires at least 2 hours or overnight.
- Preheat your oven to 375°F (191°C). Lightly grease two mini muffin pans (24-count each) with nonstick spray.
- On a lightly floured surface, roll out one pie crust. Using a 2.5 to 3-inch round cutter, cut out circles. Gently press each circle into the wells of the prepared muffin pan to form small cups. Repeat with the second pie crust.
- In a large bowl, vigorously whisk together the eggs, whole milk, heavy cream, salt, and pepper until the mixture is fully combined and slightly frothy, about one minute. Cover and refrigerate this egg custard until ready to use.
- Distribute your chosen add-ins (such as cooked ham, finely chopped spinach, or shredded cheese) evenly into the unbaked crusts in the muffin pans. It’s often best to place these directly into the crusts rather than mixing them into the egg custard beforehand.
- Carefully pour the chilled egg filling into each pie crust cup, filling them almost to the brim.
- Bake for 16-19 minutes, or until the quiches are set and the tops appear lightly golden.
- Allow the mini quiches to cool slightly in the muffin pan before carefully extracting them.
- Serve warm or at room temperature. Any remaining quiches can be stored in an airtight container in the refrigerator for up to 4 days.
Notes
- If using homemade pie dough, ensure it is thoroughly chilled (at least 2 hours or overnight).
- For best results, chill the egg custard before pouring it into the crusts.
- Store any leftovers in an airtight container in the refrigerator for up to 4 days.