Skip to content
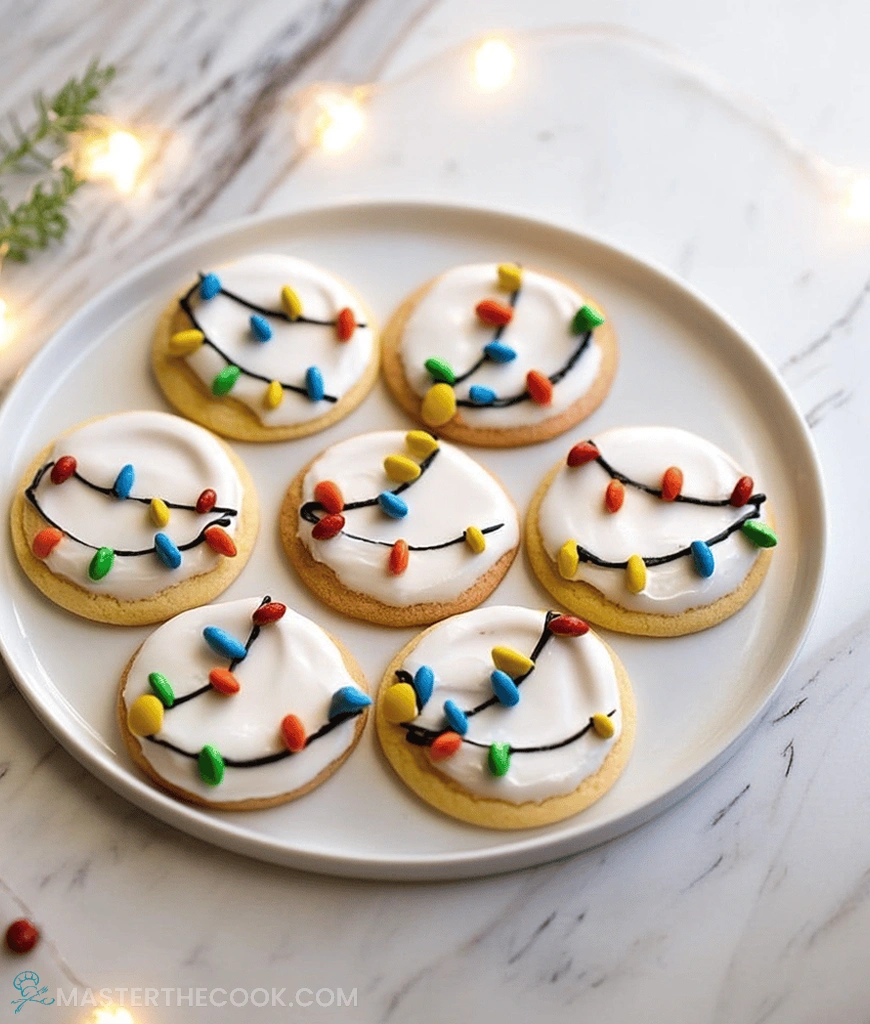
These Christmas Lights Cookies turn out just perfectly every time. Seriously, they are the ideal blend of soft and sturdy. Busy moms and professionals will adore these. They look stunning for holiday parties. I first dreamed up this design years ago. My kids wanted something way more fun than plain cutouts. So, I set out to make edible holiday cheer appear.
I tested this sugar cookie base nearly nine times last year. Yes, nine full batches! Consequently, I found the exact sweet spot for texture. The trick lies in the rolling thickness and the quick chill time. This ensures your Christmas Lights Cookies hold their light shape beautifully. Wait until you see the decoration magic next!
Why You’ll Love This Recipe
- Instant Wow Factor: These Christmas Lights Cookies look intricate but use simple candies. They definitely become the star of any cookie plate.
- Kid-Friendly Fun: Decorating is easy and hands-on for little helpers. Kids adore pressing in those colorful M&Ms.
- Perfect Cookie Base: The sugar cookie holds its shape well during baking. That means your light strings look neat and tidy.
- Great Make-Ahead: You can bake the bases days ahead of time. Then, assembly is fast right before your party.
Ingredients You’ll Need
Gathering these few components makes gorgeous Christmas Lights Cookies possible. Honestly, the dough comes together like a dream. I always use room-temperature butter for creaming; it whips up much lighter. Furthermore, avoid adding too much flour which makes the cookies tough. We want tender, sturdy little canvases for our lights!
Essential Baking Components
- 1 cup (2 sticks) unsalted butter, softened: This must be truly softened, not melted, for proper creaming. It gives richness and tenderness.
- 1 1/2 cups granulated sugar: Sweetness and structure come from this crystalline powerhouse. Cream it well with the butter for air.
- 1 large egg: Acts as a binder, holding our festive dough together. Make sure it is at room temperature too.
- 1 teaspoon vanilla extract: Standard pure vanilla adds that classic, warm backdrop flavor. Don’t skimp on quality here.
- 3 cups all-purpose flour: The main structure builder for our cookie cutouts. Add it slowly to prevent overmixing.
- 1 teaspoon baking powder: This provides just a little lift so cookies aren’t too dense.
- 1/2 teaspoon salt: Balances the sweetness perfectly; essential for depth of flavor.
Perfecting the Icing and Decoration
- 2 cups powdered sugar: Makes the smooth, sweet base coating for the lights. Sift it if you notice lumps.
- 2-3 tablespoons milk: Used to thin the powdered sugar into a usable glaze consistency. Start small!
- 1/2 teaspoon vanilla extract (for icing): Enhances flavor in the white base coat.
- Black gel food coloring (or black icing pen): Creates the essential black wire look. Gel colors give deeper saturation.
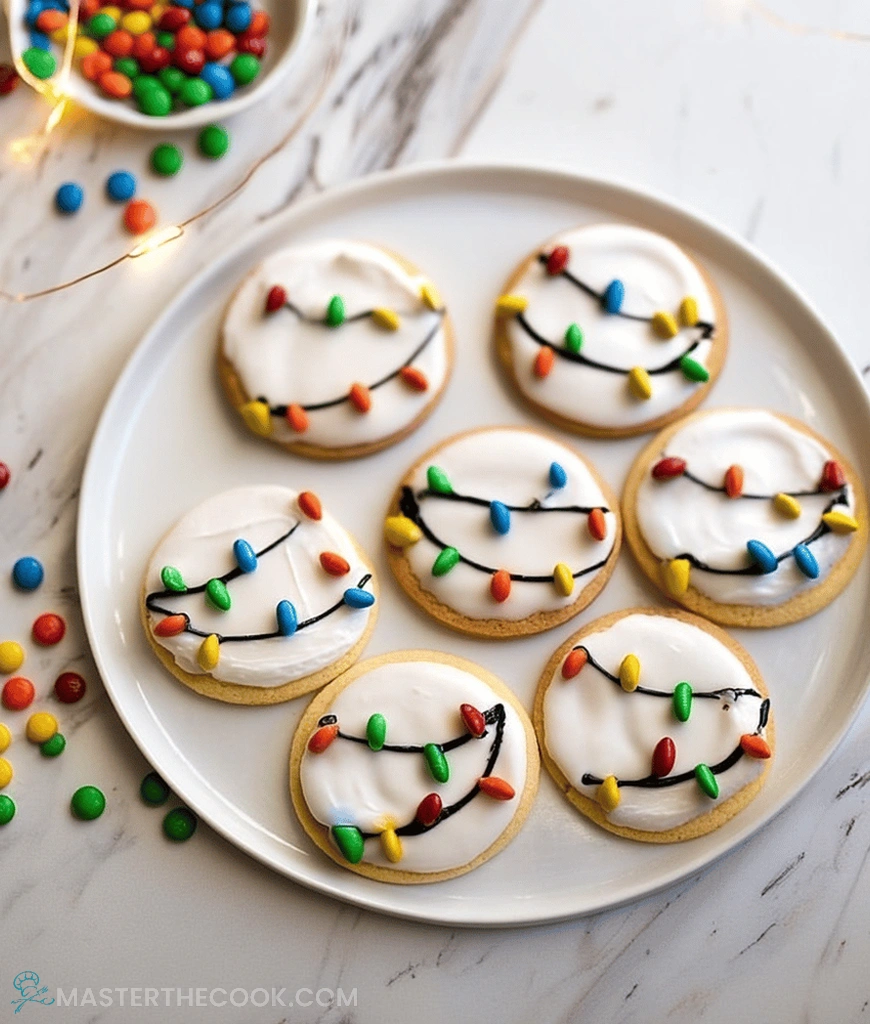
- Mini M&M’s candies (red, green, yellow, blue, orange): These are our vibrant, shiny little lights! Use a good mix of colors.
How to Make Christmas Lights Cookies
Step 1: Preparing the Sugar Cookie Base
First, preheat your oven right now to 375 degrees Fahrenheit. Also, line your baking sheets carefully with parchment paper. This keeps things tidy later. Get your large bowl ready for mixing. Cream the softened butter and sugar together well. You want the mixture light and wonderfully fluffy. Next, beat in the egg and vanilla extract quickly. Mix until everything looks completely combined. This initial step is key for texture.
Step 2: Forming and Cutting the Dough
In a separate bowl, whisk the dry ingredients together. That means the flour, baking powder, and salt go in there. Gradually add these dry items to the wet mix slowly. Stop mixing when the dough just comes together. Do not overmix at this stage, seriously. On a lightly floured surface, roll your dough out evenly. Aim for about one-quarter inch thickness there. Now, cut out small rectangles like little light bulbs. Alternatively, use any fun holiday cookie cutter you possess. Place them an inch apart on the prepared sheets.
Step 3: Baking and Cooling
Time to bake these festive friends. Bake them for about eight to ten minutes safely. Watch for lightly golden edges; this shows they are done. Remove them from the oven promptly then. Allow them to cool on the baking sheet briefly. Then, transfer the cookies to a wire rack. They must cool completely before icing proceeds. Impatient decorating leads to messy, sad sugar cookies, trust me!
Step 4: Creating the Simple Glaze
We need a simple, sweet base coat now. Whisk the powdered sugar into a medium bowl easily. Add in the milk and vanilla extract slowly. Whisk until the mixture looks very smooth. If it seems too thick, add minimal milk. If it is too runny for coating, add a bit more powdered sugar. This easy glaze sets up nicely for our next steps.
Step 5: Decorating Your Christmas Lights Cookies
Once cookies are totally cool, start the fun part. Frost each cookie thinly with the white glaze. Let this base coat set up for about twenty minutes. Set time is crucial here, friends. Next, use black gel coloring to draw a thin line. This line resembles the string holding your lights together. Carefully place the colorful mini M&M’s along this black wire. Press them gently right into the glaze slightly. Let these Christmas Lights Cookies dry completely before storing them.
How to Serve Christmas Lights Cookies
Serving these cheerful cookies is almost as fun as making them. Because they look so recognizable, they always spark happy comments. I love seeing people pick them up curiously. They truly shine on any dessert table setting. Enjoy the compliments coming your way, because you deserve them!
Garnishes
I rarely garnish these cookies further. Honestly, the M&M lights provide all the necessary pop. However, sometimes I want a little sparkle. A tiny dusting of edible silver glitter works wonders. Just tap a fine-mesh sieve lightly over them. This mimics snow or frosted lights beautifully. Furthermore, that slight shimmer elevates the cookie instantly. It adds texture without overriding the main design.
Side Dishes
These sweet treats need balancing beverages, truly. For a classic pairing, serve them with cold milk. Whole milk cuts through the richness nicely, I find. Alternatively, hot chocolate is another wonderful companion. Make sure it is not too sugary, though. A slightly unsweetened black coffee works for adults. This combination balances the sugar content perfectly.
Creative Ways to Present
Presentation really matters for holiday baking, right? First, try arranging them on a long, white platter. Make sure the cookies look like one long string of lights. Use a slight curve for visual interest there. Another idea is assembling them on a tiered serving stand. Place them near the top tier for maximum visibility. This makes your Christmas Lights Cookies seem very special.
Make Ahead and Storage
Planning ahead prevents holiday kitchen stress. These festive cookies are surprisingly freezer-friendly, which is a lifesaver. Knowing how to store your Christmas Lights Cookies keeps them fresh for guests. I always prepare the cookie base early. Then, the decoration phase happens closer to serving time. Let’s talk specifics for keeping that icing perfect.
Storing Leftovers
Once fully dry, store your decorated cookies right away. Use a sturdy, airtight container for best results. I suggest lining the bottom with parchment paper first. This creates a gentle buffer layer. Keep them at room temperature, not in the fridge please. Refrigeration can actually make the sugar cookie slightly soft. They should stay perfectly good for nearly five days this way. Never store them damp; wait until the icing is rock hard.
Freezing
Yes, you absolutely can freeze these cookies! I highly recommend freezing the undecorated baked cookies. Wrap each cooled cookie tightly in plastic wrap first. Then, place them inside a large freezer bag system. They maintain excellent quality for up to three months frozen solid. Do not freeze them once the M&Ms are applied, though. Thaw the baked cookies overnight on the counter first. Then, decorate them the next day for the best texture.
Reheating
Reheating is simple since these are not saucy desserts. Honestly, I rarely reheat finished Christmas Lights Cookies at all. If they are slightly stale after a week, try this method. Warm your oven to a low 300 degrees Fahrenheit. Place cookies on a lined baking sheet very briefly. Heat them for only three to five minutes max. This gently softens the cookie base again beautifully. Avoid the microwave; it makes them chewy and weird, trust me on that one.
Recipe Tips
- Preparation Tips: Ensure your butter is perfectly softened for maximum air incorporation. Always sift your powdered sugar for the icing base.
- Cooking Techniques: Watch your baking time closely; slight underbaking keeps the center softer. Adjust heat if your oven runs hot or cold typically.
- Substitutions: You can use any small, colorful candy instead of M&Ms if needed. Almond extract can replace vanilla for a slightly different flavor profile.
- Pro Tips: Let the white base icing set firmly before drawing the black wire. This prevents the colors from mingling messily together into a brown smudge.
Christmas Lights Cookies

A festive recipe for making sugar cookies decorated to look like Christmas light strings, using icing and colorful mini M&M’s.
- Prep Time: 30 minutes
- Cook Time: 10 minutes
- Total Time: About 1 hour 40 minutes (including cooling and drying time)
- Yield: Varies based on cookie size, likely 3-4 dozen
- Category: Dessert/Cookie
- Method: Baking
- Cuisine: American
- Diet: Vegetarian
Ingredients
- 1 cup (2 sticks) unsalted butter, softened
- 1 1/2 cups granulated sugar
- 1 large egg
- 1 teaspoon vanilla extract
- 3 cups all-purpose flour
- 1 teaspoon baking powder
- 1/2 teaspoon salt
- 2 cups powdered sugar
- 2–3 tablespoons milk
- 1/2 teaspoon vanilla extract (for icing)
- Black gel food coloring (or black icing pen)
- Mini M&M’s candies (red, green, yellow, blue, orange)
Instructions
- Preheat oven to 375°F (190°C). Line baking sheets with parchment paper.
- In a large bowl, cream together softened butter and granulated sugar until light and fluffy. Beat in the egg and vanilla extract until well combined.
- In a separate bowl, whisk together flour, baking powder, and salt. Gradually add the dry ingredients to the wet ingredients, mixing until just combined and a soft dough forms. Do not overmix.
- On a lightly floured surface, roll out the dough to about 1/4-inch thickness. Cut out rectangular shapes (about 2 inches long and 1 inch wide) using a knife or a rectangular cookie cutter. You can also cut out traditional sugar cookie shapes and just make the “lights” on them.
- Place cookies on the prepared baking sheets, about 1 inch apart.
- Bake for 8-10 minutes, or until the edges are lightly golden. Let cool on the baking sheet for a few minutes before transferring to a wire rack to cool completely.
- Prepare the icing: In a medium bowl, whisk together powdered sugar, milk, and vanilla extract until smooth. Add more milk if needed for a thinner consistency, or more powdered sugar for a thicker one.
- Once cookies are completely cool, frost each cookie with a thin layer of white icing. Let the icing set slightly (about 15-20 minutes).
- Using the black gel food coloring or icing pen, draw a wavy or straight “wire” across each frosted cookie.
- Carefully place mini M&M’s along the black “wire” to represent the colorful lights, pressing them gently into the icing before it fully dries.
- Let the cookies dry completely before storing in an airtight container.
Notes
- Ensure the butter is properly softened for the creaming process.
- Do not overmix the dough once the flour is added to keep the cookies tender.
- Adjust icing consistency by adding milk (thinner) or powdered sugar (thicker).
- Allow the base white icing to set before drawing the black ‘wire’ to prevent colors from bleeding.
Nutrition
- Serving Size: 1 cookie
- Calories: Estimated 150-200
- Sugar: High
- Sodium: Low to Moderate
- Fat: Moderate
- Saturated Fat: Moderate
- Unsaturated Fat: Low
- Trans Fat: Negligible
- Carbohydrates: Moderate to High
- Fiber: Low
- Protein: Low
- Cholesterol: Low to Moderate