Skip to content
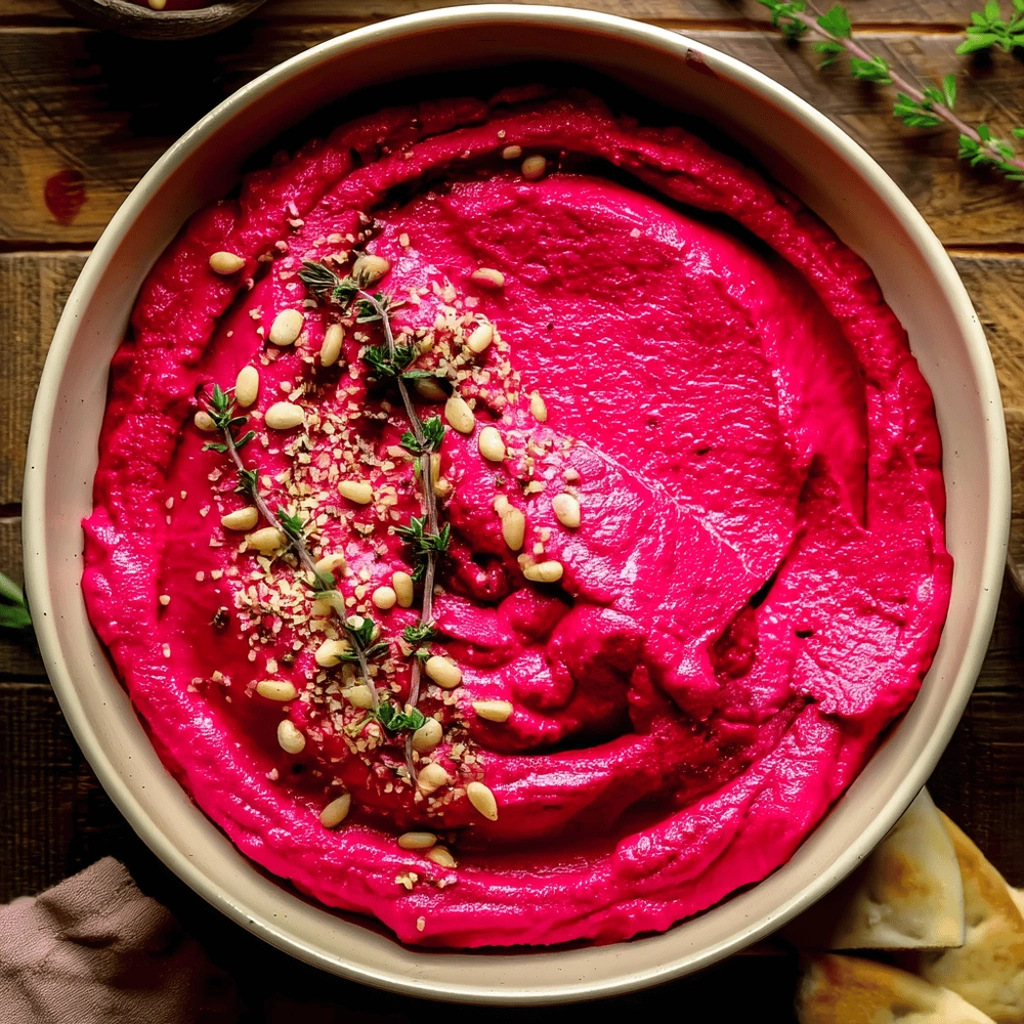
Friends, let me start by saying this recipe yields the silkiest, most vibrant dip you have ever seen. Seriously, this Beet Hummus is truly a showstopper. It appeals to everyone, even the veggie skeptics at my table. Because roasting the beets ahead of time makes assembly a breeze, this dip is perfect for busy weeknights. I first dreamed up this version after a trip overseas. I wanted that familiar creamy chickpea base. But I craved something bolder, something jewel-toned for my usual appetizer spread.
I tested this mixture nearly seven times before I settled on this exact ratio. That’s dedication, right there. My secret, which I will share later, involves a specific chilling method. Furthermore, this technique ensures your final Beet Hummus is whipped, not merely blended. You will be genuinely surprised at the difference it makes. Get ready for your new favorite spread ever.
Why You’ll Love This Recipe
- Stunning Presentation: The natural magenta color makes every serving look special. It truly is party-ready right out of the bowl.
- Quick Assembly Time: Once beets are cooked, blending the Beet Hummus takes less than ten minutes. Weeknight snacking just got an upgrade.
- Surprisingly Healthy: You get lots of fiber and nutrients from both chickpeas and root vegetables. It feels indulgent but it is quite wholesome.
- Make-Ahead Marvel: This dip tastes even better the next day. Prepare it completely before your big event for zero day-of stress.
Vibrant Color and Flavor Profile
This section explains why the color is so rich. We use just the right amount of cooked beet. Plus, the combination of tahini and cumin balances the earthiness wonderfully. You will never go back to plain hummus again after trying this version.
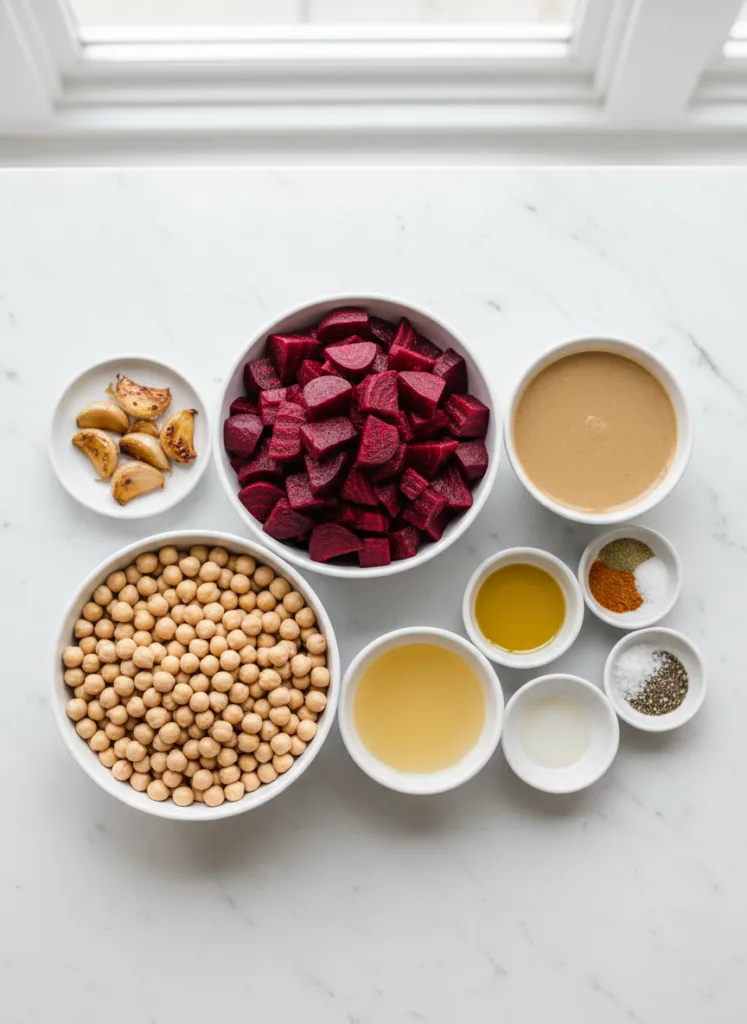
Ingredients You’ll Need
Gathering these simple components truly transforms your standard chickpea dip. The magic happens when the earthy beet kisses the creamy tahini, you see. I always prefer roasting my beets instead of boiling them. Roasting concentrates that gorgeous sweetness beautifully. Also, make sure your chickpeas are rinsed well until the water runs clear. This small step prevents that tinny flavor sometimes found in store-bought varieties.
Essential Components for Flavorful Beet Hummus
- Beet: One medium beet, roasted or boiled, then peeled. This is the heart of the color and the earthy sweetness. Ensure it is completely tender before using it in our Beet Hummus recipe.
- Chickpeas: One 15-ounce can, rinsed and drained. These provide the necessary body and protein for the classic foundation. I sometimes use the aquafaba for thinning, but cold water works better here.
- Tahini: A quarter cup of good quality sesame paste. Tahini lends richness and that essential nutty backbone. Always stir your tahini jar well before measuring it out.
- Lemon Juice: Two tablespoons of fresh juice are vital. Lemon brightens everything up here. It cuts through the richness wonderfully, preventing the dip from feeling heavy.
- Garlic: One small clove, minced fine. Garlic adds a necessary pungent kick. If you fear strong garlic, use half a clove or roast it with the beet first.
- Cold Water: Two to three tablespoons, added one at a time. This helps the food processor achieve that super smooth, decadent texture we are aiming for.
- Olive Oil: Two tablespoons of extra virgin oil goes into the blend. Furthermore, a little more is saved for drizzling on top as a garnish later.
- Ground Cumin: Just half a teaspoon is needed. Cumin brings that warm, familiar Middle Eastern aroma. It complements the beets perfectly, trust me.
- Salt and Pepper: Use these to taste at the end. Seasoning amounts vary greatly depending on your tahini saltiness.
How to Make Beet Hummus
Making this vibrant dip is quite straightforward, I promise you. Follow these steps closely. You will soon have the creamiest chickpea dip ever. Remember, consistency in technique creates a better final product. Let us begin transforming these simple vegetables into something spectacular.
Step 1: Preparing the Beets
First, ensure your beets are fully cooked until wonderfully tender. If you roast them, wrap them tightly in aluminum foil before baking. This keeps all the moisture locked inside. Alternatively, boiling works too, but roasting deepens that essential sweetness. After cooking, let the beets cool slightly. Then, the skin should slip right off easily. Roughly chop the cooled, peeled beet ready for the processor.
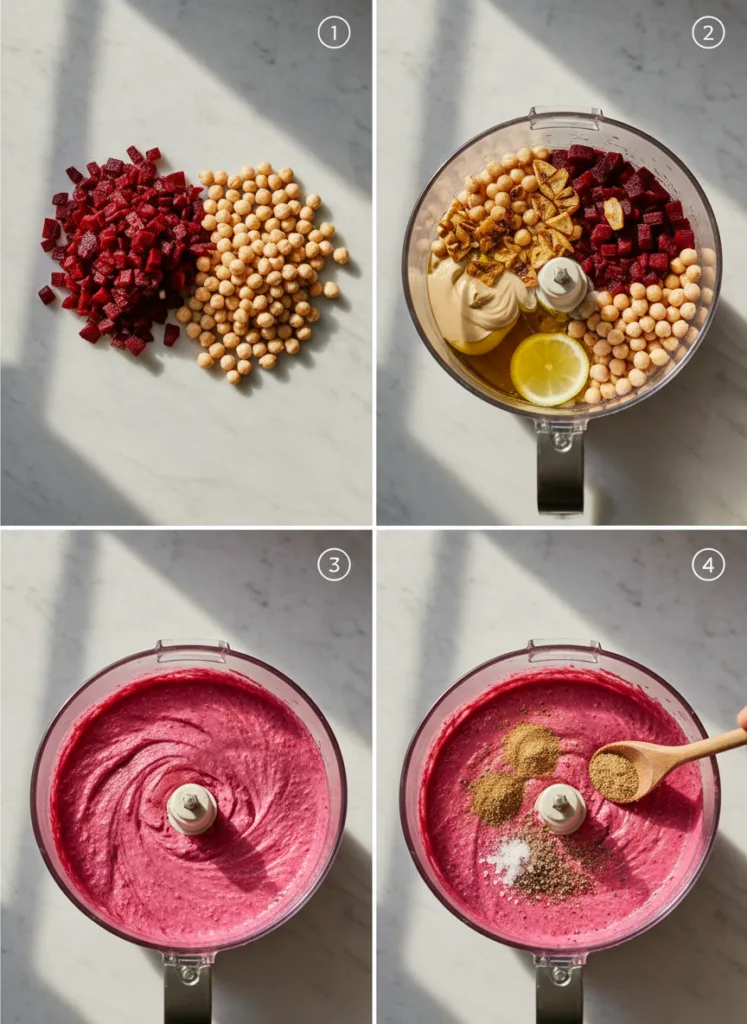
Step 2: Blending the Beet Hummus Base
Now, grab your food processor; this is where the magic happens. Add the chopped beet pieces into the bowl first. Next, toss in the drained chickpeas. Pour in the tahini and the fresh lemon juice. Don’t forget the minced garlic clove. Then, add the olive oil and the cumin spice. Add two tablespoons of cold water right away. Secure that lid firmly before turning the machine on.
Step 3: Achieving Perfect Consistency
Process everything until the mixture looks mostly smooth. Stop the machine often to scrape down the sides. We want zero chunks remaining in our Beet Hummus. If the mixture seems too thick, start adding more cold water slowly. Add it just one tablespoon at a time. Keep blending until you reach that desired silky, whipped texture. Patience here pays off big time for your ultimate chickpea dip.
Step 4: Final Seasoning and Plating
Once you love the texture, taste the dip carefully. Adjust the salt and black pepper levels as needed now for seasoning. Transfer your finished dip to a lovely serving bowl. Next, drizzle the top with a little extra virgin olive oil for shine. For an added pop of color, sprinkle on some fresh chopped herbs. Serve this gorgeous spread immediately with your favorite dippers.
How to Serve Beet Hummus
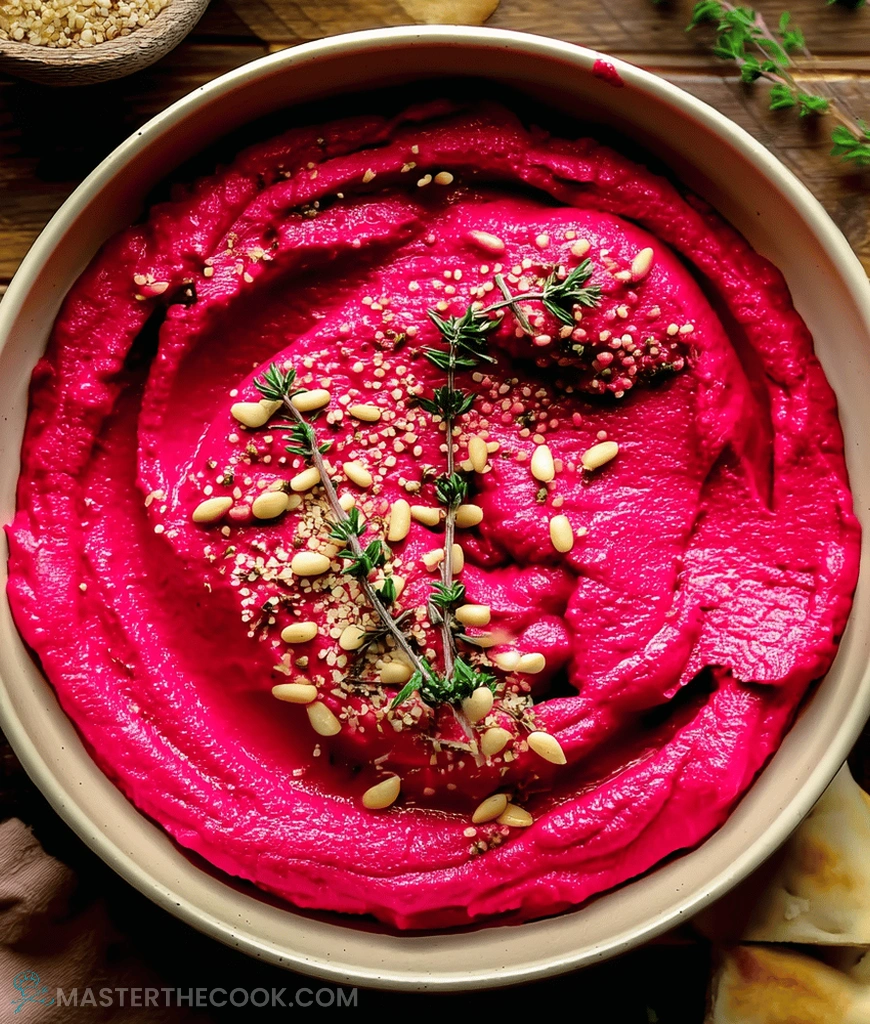
Serving this gorgeous Beet Hummus is almost as fun as making it. Presentation really matters, especially when company drops by unexpectedly. Think of the toppings as jewelry for your dip. They add lovely bursts of flavor and texture. A simple garnish elevates this from snack to centerpiece instantly. This bright, flavorful chickpea dip deserves a beautiful presentation.
Garnishes
I love making my garnishes count. For authenticity, a generous drizzle of high-quality extra virgin olive oil is non-negotiable. Next, sprinkle on some fresh, chopped parsley or maybe cilantro. Parsley gives a clean, fresh finish. Toasted pine nuts offer a stunning textural crunch. They contrast perfectly with the smooth spread. A light dusting of smoked paprika adds visual appeal too. It complements the richness of the Beet Hummus so well.
Side Dishes
When pairing sides, think about texture and temperature contrast. Warm, fluffy pita bread is always a winner, warmed briefly in the oven until pillowy. Alongside that, I suggest serving crunchy cucumber spears. Cucumbers offer refreshing coolness against the earthy beet flavor. Carrot sticks, cut thick, also work great for dipping. They provide a nice, sweet snap that balances the dip beautifully.
Creative Ways to Present
For entertaining, try arranging the dip in a shallow, dark ceramic bowl. This makes the beet color absolutely pop visually. Before serving, use the back of a spoon to create a lovely swirl pattern. Then, place the olive oil drizzle right into those valleys. Another idea is serving individual portions in small glass ramekins. These tiny cups look elegant on a buffet line or appetizer tray.
Make Ahead and Storage
I know how hectic life gets sometimes, busy moms and professionals. Planning ahead is our secret weapon, right? Luckily, this Beet Hummus is a dream for preparation. You can easily make it days before you need it. This means less stress when guests arrive or when the kids demand an after-school snack. Proper storage keeps this vibrant dip tasting fresh, too. Follow these simple guidelines. You will maintain that incredible texture and color easily.
Storing Leftovers
Store any remaining Beet Hummus tightly. An airtight container works best in the refrigerator. It keeps well for about four full days. Keeping it cold preserves the bright flavor nicely. Do store any fresh garnishes separately, though. Things like chopped parsley or a drizzle of olive oil should wait. Add those just before serving again. This prevents sogginess and keeps the oil from separating.
Freezing
Yes, you absolutely can freeze this fantastic dip! Freezing is totally feasible, believe it or not. Skip adding fresh lemon juice or any herbs before freezing. The texture holds up remarkably well after thawing. Wrap the solid hummus tightly in two layers of plastic wrap. Then, tuck it into a freezer-safe bag. It lasts well for two months easily. Thaw slowly overnight in the refrigerator for the best results.
Reheating
Reheating is usually only necessary if you froze your dip. Microwaving is quick but can sometimes alter texture awkwardly. Instead, try reheating gently in a very low oven. Set your oven to about 275 degrees Fahrenheit. Warm it for only about ten minutes total. Remember to stir in a tiny splash of cold water before warming it up. Wait to add fresh lemon juice until it is fully warmed through for the best taste.
Recipe Tips
- Preparation Tips: Always roast your beets until they are fork-tender for the best sweetness. Chop the cooked beet into smaller pieces beforehand. This helps your food processor work more efficiently when making the Beet Hummus.
- Cooking Techniques: Process in short bursts initially. This prevents the motor from overheating too quickly. Aim for the smoothest texture possible before adding any extra liquid.
- Substitutions: If you lack tahini, use sunbutter for a nuttier, different flavor profile. You can substitute fresh lemon juice with lime juice in a pinch.
- Pro Tips: Chill your ingredients slightly before blending. I find this helps achieve an incredibly light and creamy final texture. Always taste and adjust salt last.
Maximizing Flavor in Your Beet Hummus
To really maximize flavor, consider roasting your garlic clove alongside the beet once. This mellows the harsh bite considerably. It adds a lovely depth to the overall flavor experience. Also, using high-quality, fresh lemon juice makes a huge difference in brightness.
PrintBeet Hummus
A vibrant and flavorful twist on traditional hummus, featuring the earthy sweetness of roasted or boiled beets.
- Prep Time: 15 minutes
- Cook Time: 30-60 minutes (for roasting/boiling beets)
- Total Time: 45-75 minutes
- Yield: About 2 cups 1x
- Category: Dip/Spread
- Method: Food Processor
- Cuisine: Middle Eastern/Mediterranean inspired
- Diet: Vegetarian
Ingredients
- 1 medium beet, roasted or boiled and peeled (about 1 cup chopped)
- 1 (15-ounce) can chickpeas, rinsed and drained
- 1/4 cup tahini
- 2 tablespoons fresh lemon juice
- 1 clove garlic, minced
- 2–3 tablespoons cold water, as needed
- 2 tablespoons extra virgin olive oil, plus more for garnish
- 1/2 teaspoon ground cumin
- Salt and freshly ground black pepper to taste
Instructions
- If using raw beets, roast or boil them until tender. Once cooked, peel and roughly chop the beet.
- In a food processor, combine the chopped beet, chickpeas, tahini, lemon juice, minced garlic, 2 tablespoons cold water, olive oil, and cumin.
- Process until completely smooth, scraping down the sides as needed. If the hummus is too thick, add more cold water, 1 tablespoon at a time, until desired consistency is reached.
- Season with salt and pepper to taste.
- Transfer to a serving bowl. Drizzle with a little extra olive oil and garnish with fresh herbs (like parsley or cilantro) if desired. Serve with pita bread, crackers, or vegetables.
Notes
- For best flavor, ensure the beet is fully cooked until tender before processing.
- Fresh herbs like parsley or cilantro can be used for garnish.
- Serve with pita bread, crackers, or vegetables.
Nutrition
- Serving Size: 1/4 cup (estimated)
- Calories: 200-250 (estimated)
- Sugar: 5-10g (estimated, mostly natural from beets)
- Sodium: 200-400mg (estimated, depends on added salt)
- Fat: 12-18g (estimated)
- Saturated Fat: 1-3g (estimated)
- Unsaturated Fat: High (estimated)
- Trans Fat: 0g
- Carbohydrates: 20-30g (estimated)
- Fiber: 5-8g (estimated)
- Protein: 6-10g (estimated)
- Cholesterol: 0mg